Lab 3.2: Graphical user interfaces
Part of Week 3: Practical python, some useful librariesGeneral setup
For all lab exercises you should create a folder for the lab somewhere sensible.
Assuming you have a GAMR1520-labs folder, you should create a GAMR1520-labs/week_3 folder for this week and a GAMR1520-labs/week_3/lab_3.2 folder inside that.
Create a collection of scripts. If necessary, use folders to group related examples.
GAMR1520-labs
└─ week_3
    └─ lab_3.2
        ├─ experiment1.py
        └─ experiment2.py
Try to name your files better than this, the filename should reflect their content. For example, string_methods_.py, conditionals.py or while_loops.py.
Make sure your filenames give clues about what is inside each file. A future version of you will be looking back at these, trying to remember where a particular example was.
General approach
As you encounter new concepts, try to create examples for yourself that prove you understand what is going on. Try to break stuff, its a good way to learn. But always save a working version.
Modifying the example code is a good start, but try to write your own programmes from scratch, based on the example code. They might start very simple, but over the weeks you can develop them into more complex programmes.
Think of a programme you would like to write (don't be too ambitious). Break the problem down into small pieces and spend some time each session trying to solve a small problem.
In this lab session we will play with tkinter, a graphical user interface (GUI) toolkit originally designed for the Tcl language.
The official python documentation is not great for learning tkinter. More useful documentation can be found here.
If you want to explore the tkinter system further then the tk-tutorial is very good.
tkinter allows us to build complex GUI’s very easily.
However, it won’t do the design work for us.
We need to design our interface first and then implement the design using tkinter.
This means understanding exactly where we want our widgets to appear.
Table of contents
- Inheriting from
tk.Tk - Labels
- Buttons
- Listbox and entry widgets
- Layout using
grid() - Activating the Entry widget
- Activating the buttons
- Compound widgets and UI design
- We can do better
- Adding items
- Clearing the list
- An ‘empty list’ message
- Deleting an item
Inheriting from tk.Tk
To use tkinter, we first need to import it.
A common convention is to rename the module as tk to keep the name short, as it may be used a lot.
import tkinter as tk
Then we will need a top-level window to contain our interface.
We do this by inheriting from tk.Tk.
The tk.Tk class is a top-level window.
It is the window which, if closed, will close the entire application.
import tkinter as tk

class MyApplication(tk.Tk):
    def __init__(self):
        super().__init__()
        # add and position `widgets` here
We haven’t seen inheritance before. Inheritance allows us to take the existing
tk.Tkclass and add our own extensions to it.We could have inherited from
tk.Frameor from nothing at all. Usingtk.Tkas the basis for simple apps makes things a little easier.
Our class now is a tk.Tk object.
But this code doesn’t yet contain anything visible.
Labels
We need to add some widgets.
The visible things on our window are known as widgets.
So lets add some simple tk.Label widgets.
Labels are one of the simplest widgets, they just present text.
import tkinter as tk

class MyApplication(tk.Tk):
    def __init__(self):
        super().__init__()
        self.intro1 = tk.Label(text="This is just some text")
        self.intro2 = tk.Label(text="and some more")
        self.intro1.grid()
        self.intro2.grid()
Notice we specify the text as an argument when we create a tk.Label instance.
Creating a widget does not automatically place it in our window.
This is good. It separates the code for widget creation from its positioning. This means we need to write quite a lot of code, but it makes the system very flexible. For example, our application might have a hidden widget that should be shown only sometimes, or it might move a widget around depending on our own custom logic.
We need to call the grid() method on each label in order to register it with the grid geometry manager and place it on the interface.
Other geometry managers are available, but we will use
gridto position all our widgets because it is the most flexible. Online examples will often use other geometry managers.
At the end of our script, we can now create an instance of our application and start the tkinter main loop like this.
app = MyApplication()
app.mainloop()
This results in a simple application window with two labels.
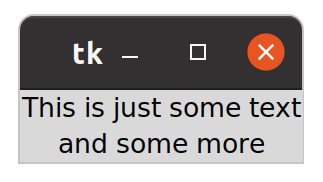
Your window manager may produce a different, but similar result.
A bit more style
Our application looks a bit basic and has the default title ‘tk’.
We can set the title of the main window by calling self.title and passing in the string we want to be displayed.
There are many ways to add some style.
We can add some padding around the labels by passing keyword arguments to grid.
Usually, layout is handled by these grid calls.
We can also choose the fonts to be used as an argument to the tk.Label constructor.
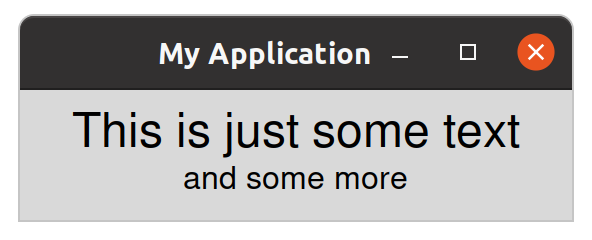
Here’s an upgraded example.
import tkinter as tk

small = ('Helvetica', 12)
large = ('Helvetica', 18)

class MyApplication(tk.Tk):
    def __init__(self):
        super().__init__()
        self.title('My Application')
        self.intro1 = tk.Label(
            text="This is just some text",
            font=large
        )
        self.intro2 = tk.Label(
            text="and some more",
            font=small
        )

        self.intro1.grid(pady=(20, 0), padx=50)
        self.intro2.grid(pady=(0, 20))

app = MyApplication()
app.mainloop()
Try changing the label colours using the
fg(foreground) andbg(background) arguments.
We declared some variables to hold the font values. Fonts are set as two-tuples containing the font-family name and the font size.
Notice we set
padxto a single value,50which is applied left and right but we setpadyto a two-element tuple representing top and bottom padding.
Other useful keywords for styling are
fgandbgwhich are used to set the foreground colour (i.e. the text colour) and the background colour.
Try experimenting with different values for padding, font size, colours and so on.
Buttons
Buttons are easy enough.
The only thing to remember is to add a command argument.
This can be set to any function or method (anything callable).
Buttons will call their command when they are clicked.
import tkinter as tk

small = ('Helvetica', 12)
large = ('Helvetica', 18)

class MyApplication(tk.Tk):
    def __init__(self):
        super().__init__()
        self.title('My Application')
        self.intro1 = tk.Label(
            text="This is just some text",
            font=large
        )
        self.intro2 = tk.Label(
            text="and some more",
            font=small
        )
        self.btn = tk.Button(
            text="Click me",
            font=large,
            command=self.clicked
        )

        self.intro1.grid(pady=(20, 0), padx=50)
        self.intro2.grid()
        self.btn.grid(pady=20)

    def clicked(self):
        print("I was clicked!!")

app = MyApplication()
app.mainloop()
The resulting application looks like this.
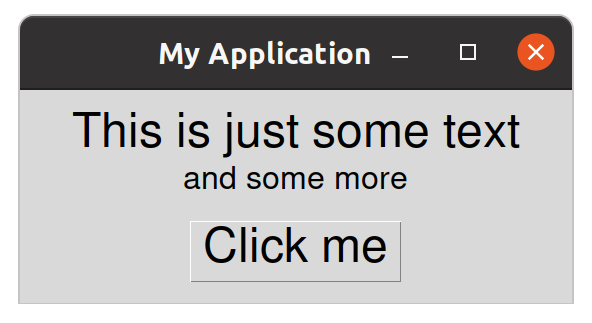
Clicking the button now calls our clicked method which simply prints a message to the console.
We can make the button do anything. Perhaps it’s more useful to count how many clicks have occurred and to display the number by updating the button text.
import tkinter as tk

small = ('Helvetica', 12)
large = ('Helvetica', 18)

class MyApplication(tk.Tk):
    def __init__(self):
        super().__init__()
        self.title('My Application')
        self.intro1 = tk.Label(
            text="This is just some text",
            font=large
        )
        self.intro2 = tk.Label(
            text="and some more",
            font=small
        )
        self.btn = tk.Button(
            text="Click me",
            font=large,
            command=self.clicked
        )

        self.intro1.grid(pady=(20, 0), padx=50)
        self.intro2.grid()
        self.btn.grid(pady=20)

        self.count = 0

    def clicked(self):
        self.count += 1
        self.btn.configure(text=f'{self.count} clicks')

app = MyApplication()
app.mainloop()
We can update widget configuration at any time using the generic widget configure method.
Here we are using it to update the text argument of the self.btn attribute.
Keeping references to our widgets is not strictly necessary unless we want to interact with them. The
tkintersystem will keep a list of all the widgets we create, so they are not garbage collected.
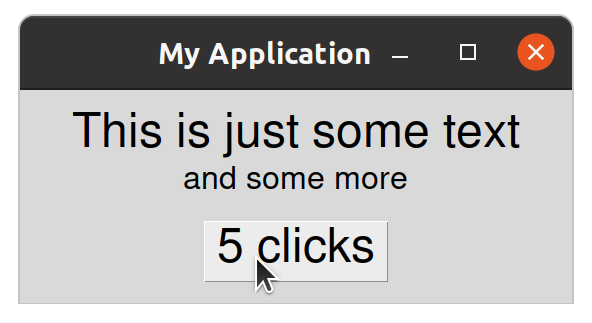
Clicking on the button will now update the button text to reflect the click count.
It’s important to understand that when we create our widgets, they only exist in memory and will not be shown in the app. They only appear when we call
grid()(or something equivalent).The
grid()method also tells our app where the widget should be placed.
Listbox and entry widgets
We are going to build a simple shopping list application to manage our usual list of strings.
The tk.Listbox widget holds a list of strings and will be used to display the shopping list.
To get information into our application, we need a tk.Entry widget.
A tk.Entry widget provides a way to take user input, a bit like the input() function.
See documentation on the tk.Listbox and tk.Entry widgets.
We are imagining an application where the user can manage a list. The user must be able to enter text and click an ‘add’ button to add a new item to the list. We also want to allow the user to select an item in the list and to update or delete the selected item by clicking either the ‘update’ or ‘delete’ button.
So, we need:
- a label with the application title
- a listbox, containing our items
- an entry field for specifying new and updated items
- an ‘add’ button
- an ‘update’ button
- a ‘delete’ button
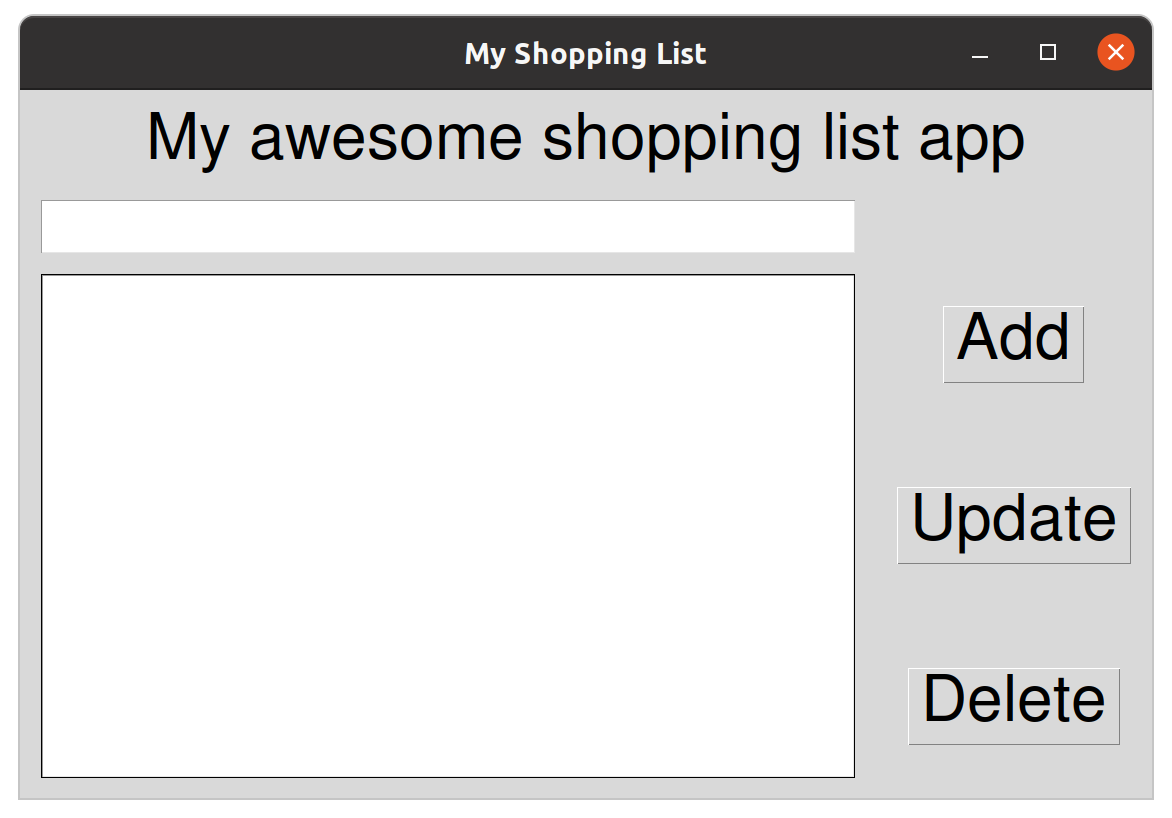
First, let’s just add the widgets into our application.
import tkinter as tk

small = ('Helvetica', 18)
large = ('Helvetica', 24)

class ShoppingList(tk.Tk):
    def __init__(self):
        super().__init__()
        self.title('My Shopping List')

        # create widgets
        self.label = tk.Label(
            text='My awesome shopping list app',
            font=large
        )
        self.list = tk.Listbox(
            selectmode=tk.SINGLE,
            font=small,
            width=30
        )
        self.entry = tk.Entry(
            font=small,
            width=30
        )
        self.add_btn = tk.Button(
            text="Add",
            font=large
        )
        self.update_btn = tk.Button(
            text="Update",
            font=large
        )
        self.delete_btn = tk.Button(
            text="Delete",
            font=large
        )

        # position widgets
        self.label.grid(padx=20, pady=20)
        self.list.grid(padx=20, pady=20)
        self.entry.grid(padx=20, pady=20)
        self.add_btn.grid(padx=20, pady=20)
        self.update_btn.grid(padx=20, pady=20)
        self.delete_btn.grid(padx=20, pady=20)

app = ShoppingList()
app.mainloop()
Notice we have changed the name of the application.
The code is already quite long. Notice the widget creation all happens at once and the layout code is grouped together. This will help us to think about positioning the elements separately from creating them.
We have updated the font sizes and chosen fonts for each of the different widgets (you can experiment with this) and we have set the width argument for the tk.Entry and the tk.Listbox.
The
widthfor these widgets is specified in characters, not pixels.
We also specified the selectmode for the Listbox so that only one item can be selected at a time.
In terms of layout, we have added 20px of padding around each widget.

Layout using grid()
OK, we have all the necessary widgets. Notice that by default, they appear in one column and are placed in the order of creation, with a new row being created for each widget.
The tk.Listbox widget has been given 10 rows by default so it is much taller than the other widgets.
You can change this by setting the
heightargument.
Our widgets are not arranged in a very intuitive way. Let’s work to a design with five rows and two columns.
| 1 | 2 | |
|---|---|---|
| 1 | tk.Label | |
| 2 | tk.Entry | |
| 3 | tk.Listbox | tk.Button |
| 4 | tk.Button | |
| 5 | tk.Button | |
From this design, we can now list the column and the row for each widget.
These will be passed in as parameter to the grid() method.
We will also set our Label to span two columns (columnspan=2) and our Listbox to span three rows (rowspan=3).
For complex designs, producing a table like this can be useful.
| widget | row | column | rowspan | columnspan |
|---|---|---|---|---|
| label | 0 | 0 | - | 2 |
| entry | 1 | 0 | - | - |
| listbox | 2 | 0 | 3 | - |
| add button | 2 | 1 | - | - |
| update button | 3 | 1 | - | - |
| delete button | 4 | 1 | - | - |
We can now set the row, column, rowspan and columnspan arguments to grid() to the appropriate values for each widget.
import tkinter as tk

small = ('Helvetica', 12)
large = ('Helvetica', 18)

class ShoppingList(tk.Tk):
    def __init__(self):
        super().__init__()
        self.title('My Shopping List')

        # create widgets
        self.label = tk.Label(
            text='My awesome shopping list app',
            font=large
        )
        self.list = tk.Listbox(
            selectmode=tk.SINGLE,
            font=small,
            width=30
        )
        self.entry = tk.Entry(
            font=small,
            width=30
        )
        self.add_btn = tk.Button(
            text="Add",
            font=large
        )
        self.update_btn = tk.Button(
            text="Update",
            font=large
        )
        self.delete_btn = tk.Button(
            text="Delete",
            font=large
        )
        # position widgets
        self.label.grid(
            padx=20,
            pady=20,
            row=0,
            column=0,
            columnspan=2
        )
        self.entry.grid(
            padx=20,
            row=1,
            column=0
        )
        self.list.grid(
            padx=20,
            pady=20,
            row=2,
            column=0,
            rowspan=3
        )
        self.add_btn.grid(
            padx=20,
            pady=20,
            row=2,
            column=1
        )
        self.update_btn.grid(
            padx=20,
            pady=20,
            row=3,
            column=1
        )
        self.delete_btn.grid(
            padx=20,
            pady=20,
            row=4,
            column=1
        )

app = ShoppingList()
app.mainloop()
Make sure you understand what happened here.
Notice, I also removed the top/bottom padding from the entry widget to make it sit between the label and the listbox padding. Obviously, you can experiment to make it look however you want.
Finally, we can tweak the layout of each widget by specifying how each should fill the space provided by the grid cell(s) it occupies.
A common way to do this is to set the sticky argument.
In this case, we want the buttons to fill their containers.
To do this, we specify that they should stick to the north, south, east and west edges of their container.
In all cases, set sticky="nsew".
import tkinter as tk

small = ('Helvetica', 18)
large = ('Helvetica', 24)

class ShoppingList(tk.Tk):
    def __init__(self):
        super().__init__()
        self.title('My Shopping List')

        # create widgets
        self.label = tk.Label(
            text='My awesome shopping list app',
            font=large
        )
        self.list = tk.Listbox(
            selectmode=tk.SINGLE,
            font=small,
            width=30
        )
        self.entry = tk.Entry(
            font=small,
            width=30
        )
        self.add_btn = tk.Button(
            text="Add",
            font=large
        )
        self.update_btn = tk.Button(
            text="Update",
            font=large
        )
        self.delete_btn = tk.Button(
            text="Delete",
            font=large
        )

        # position widgets
        self.label.grid(
            padx=20,
            pady=20,
            row=0,
            column=0,
            columnspan=2
        )
        self.entry.grid(
            padx=20,
            row=1,
            column=0
        )
        self.list.grid(
            padx=20,
            pady=20,
            row=2,
            column=0,
            rowspan=3
        )
        self.add_btn.grid(
            sticky="nsew",
            padx=(0, 20),
            pady=20,
            row=2,
            column=1
        )
        self.update_btn.grid(
            sticky="nsew",
            padx=(0, 20),
            row=3,
            column=1
        )
        self.delete_btn.grid(
            sticky="nsew",
            padx=(0, 20),
            pady=20,
            row=4,
            column=1
        )

app = ShoppingList()
app.mainloop()
Notice I tweaked the padding again to remove the top/bottom padding from the middle button and to remove the left padding from all the buttons. This kind of tweaking should be done carefully because the code itself becomes confusing very quickly. Refer back to the diagrams above to understand what is going on.
The final layout is like this:
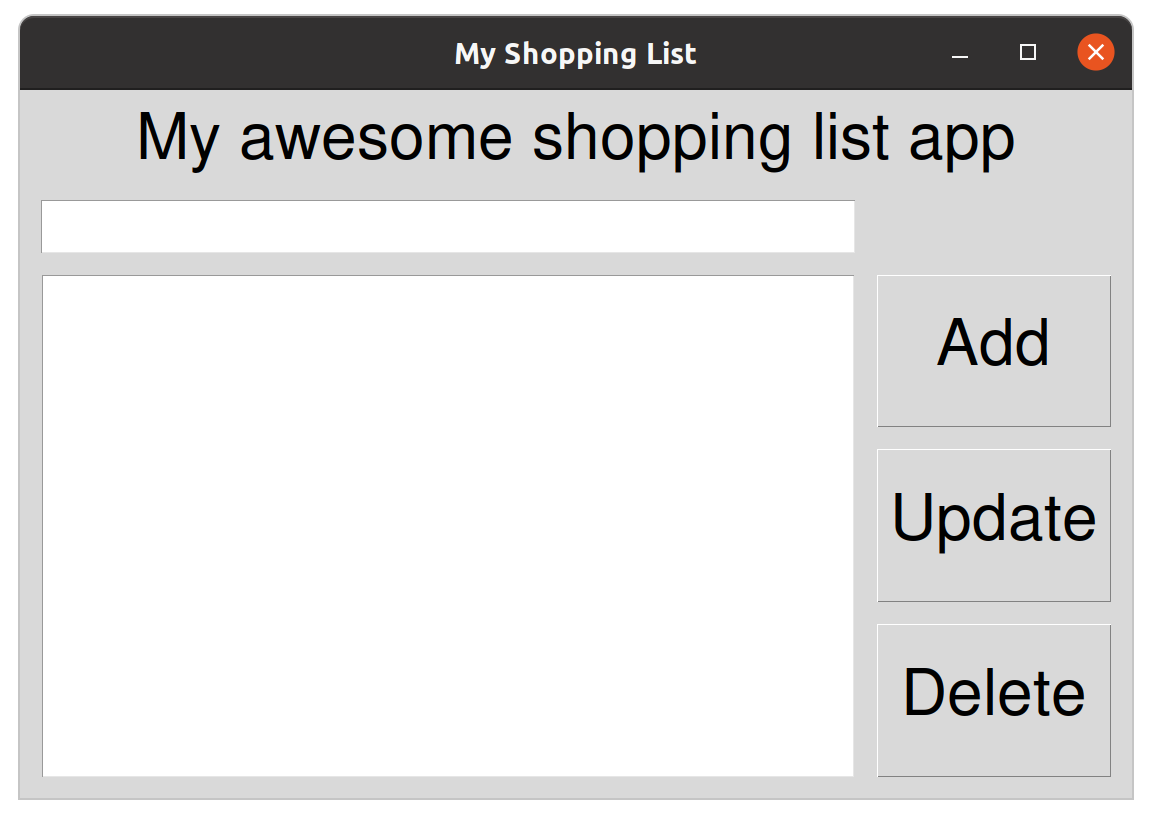
Phew! This took a lot of code. Making something look nice (or nice enough) requires careful positioning (the
column,row,columnspanandrowspanproperties, a table is useful to plan this) and precise use of thesticky,padxandpadyproperties to get everything to line up nicely.
Activating the Entry widget
Now we have our layout finalised, we can work on making the application do something useful. The core user interactions will involve entering text into the entry widget, selecting items in the list and clicking the buttons.
In order to make accessing the data from an entry widget easy, we need to specify a tk.stringVar which can be read from and written to.
This is just how
tkinterworks. Basically we can tie thetk.stringVarto a widget and it will give us a way to read and write the data usingget()andset()methods. Its inconvenient but the alternative usingconfigureis much worse.
Add the following into our __init__ method.
Make sure to run this code before the tk.Entry widget is created.
# the current/new item
self.item = tk.StringVar()
Now we can update our tk.Entry widget to use our variable like this.
self.entry = tk.Entry(
    font=large,
    width=30,
    textvariable=self.item
)
This will allow us to access the text in the entry more easily.
The
tk.StringVar(and equivalent numeric values) system is useful when different widgets need to share the same data.In this case it provides us with an easy way to read the data from the entry widget.
entered_text = self.item.get()and write data back to the widget
self.item.set("Some value")
Activating the buttons
Now we can activate each button in turn.
To do this we will specify a command which will be called when the button is pressed.
We can set the command when we create the buttons.
The ‘Add’ button
First we will need to add items to our list.
Now we can add a method to take the value from the Entry (via self.item) and add it into the listbox.
def add(self):
    """Add the current entry text to the list"""
    item = self.item.get()
    if item:
        self.list.insert(tk.END, item)
        self.item.set("")
Study the above code.
We are getting the text from the tk.Entry widget (via the tk.StringVar object).
If it contains an empty string, we ignore it and do nothing.
If it has a value, we call the tk.Listbox.insert() method to add our value to the end of the list.
We then set the tk.StringVar to an empty string to clear the added value from entry widget.
So far, this new add method will never be called.
So we update the existing add button by adding a command argument.
self.add_btn = tk.Button(
    text="Add",
    font=large,
    command=self.add
)
This means that clicking the add button will now call our function.
The final code looks like this:
import tkinter as tk

small = ('Helvetica', 18)
large = ('Helvetica', 24)

class ShoppingList(tk.Tk):
    def __init__(self):
        super().__init__()
        self.title('My Shopping List')

        # the current/new item
        self.item = tk.StringVar()

        # create widgets
        self.label = tk.Label(
            text='My awesome shopping list app',
            font=large
        )
        self.list = tk.Listbox(
            selectmode=tk.SINGLE,
            font=small,
            width=30
        )
        self.entry = tk.Entry(
            font=small,
            width=30,
            textvariable=self.item
        )
        self.add_btn = tk.Button(
            text="Add",
            font=large,
            command=self.add
        )
        self.update_btn = tk.Button(
            text="Update",
            font=large
        )
        self.delete_btn = tk.Button(
            text="Delete",
            font=large
        )

        # position widgets
        self.label.grid(
            padx=20,
            pady=20,
            row=0,
            column=0,
            columnspan=2
        )
        self.entry.grid(
            padx=20,
            row=1,
            column=0
        )
        self.list.grid(
            padx=20,
            pady=20,
            row=2,
            column=0,
            rowspan=3
        )
        self.add_btn.grid(
            sticky="nsew",
            padx=(0, 20),
            pady=20,
            row=2,
            column=1
        )
        self.update_btn.grid(
            sticky="nsew",
            padx=(0, 20),
            row=3,
            column=1
        )
        self.delete_btn.grid(
            sticky="nsew",
            padx=(0, 20),
            pady=20,
            row=4,
            column=1
        )

    def add(self):
        """Add the current entry text to the list"""
        item = self.item.get()
        if item:
            self.list.insert(tk.END, item)
            self.item.set("")

app = ShoppingList()
app.mainloop()
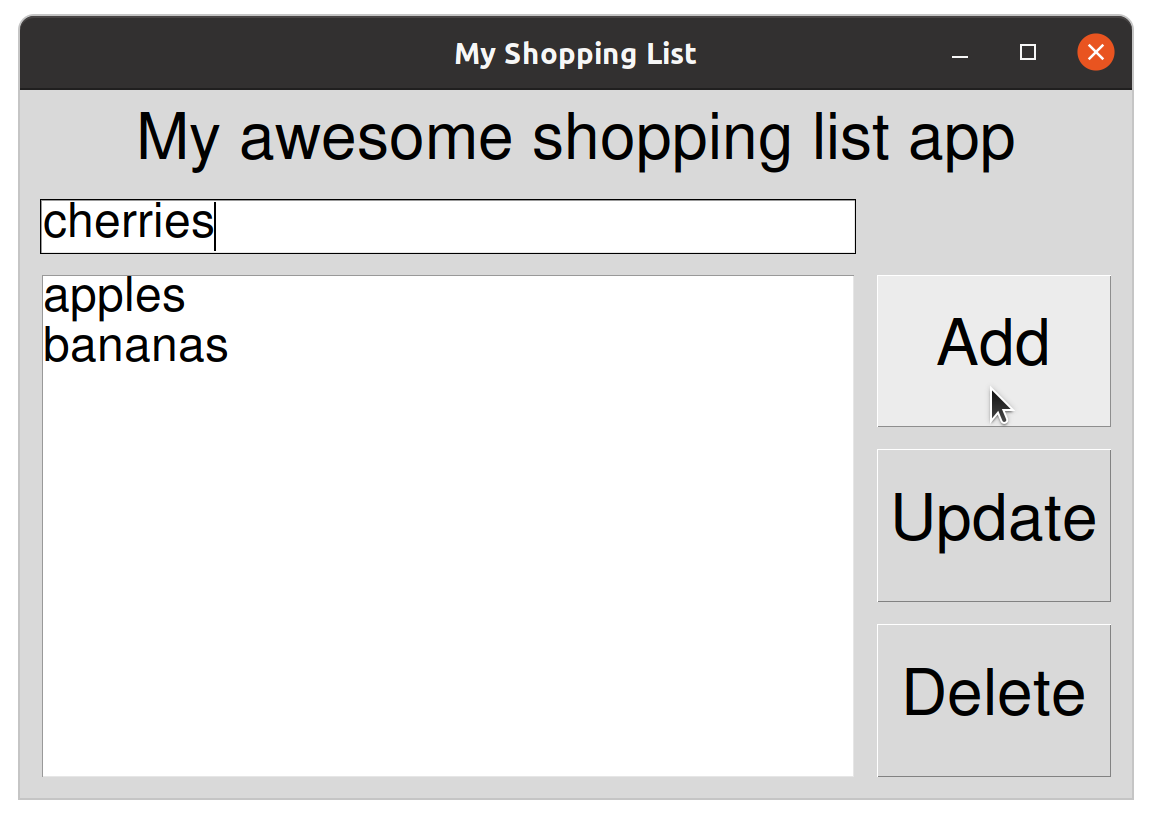
Now you should be able to add items to the list using the entry and the add button.
The ‘Delete’ button
Now, let’s update the delete button to call a new delete method.
self.delete_btn = tk.Button(
    text="Delete",
    font=large,
    command=self.delete
)
Obviously, we need to define the new method. The method needs to detect which list item is selected and to delete the appropriate item from the list.
def delete(self):
    """Delete the currently selected item"""
    index = self.list.curselection()
    if index:
        self.list.delete(index[0])
Here we are using the Listbox.curselection() method.
This will return a tuple containing the indices of all selected items.
In our case, because we specified selectmode=tk.SINGLE, we know that this will either be empty or will contain a single value.
So we check first, to make sure we have an item selected before calling the Listbox.delete() method which does the job of removing the selected item from the listbox.
When we have an item selected, the result of
Listbox.curselection()is something like(2,)- i.e. a tuple, with a single element. This is why we need to extract the actualinteger(2) from thetupleusing square bracket notationindex[0].
Try adding a few items to the list and delete specific items. You should see that the selected item is always deleted. If nothing is selected, nothing happens.
The ‘Update’ button
Now, let’s call a new update method from the update button command.
self.update_btn = tk.Button(
    text="Update",
    font=large,
    command=self.update
)
The update method needs to read the value from the entry widget, detect which list item is selected and to update the appropriate item in the listbox with the new value.
def update(self):
    """Update the currently selected item"""
    index = self.list.curselection()
    item = self.item.get()
    if index and item:
        self.list.delete(index[0])
        self.list.insert(index[0], item)
        self.item.set("")
Notice we test for both index and item together, so we only execute the block following the if statement if we have an item selected in the listbox widget (i.e. self.list.curselection() is not an empty list) and we also have new text in the entry widget (i.e. self.item.get() is not an empty string).
It turns out, that in order to update a value in the list, we actually need to delete it and insert a new value. This is no problem. We just do it.
We also set the value of the entry widget to an empty string because the updated text has been absorbed and is no longer needed.
Try it. You should now be able to use the update button to replace a selected item with the entered text.
Some final tweaks
Our app now pretty much does everything we need it to do.
One thing we can do is help a user who wants to edit a spelling error in an item by prefilling the entry widget with the selected item value when the user selects an item.
To do this, we need to register code (an event handler) and bind it to the <<ListboxSelect>> event.
We can do this by calling the bind() method on the list widget.
Add this to the __init__ method, after you have created the listbox.
# events
self.list.bind("<<ListboxSelect>>", self.select)
Now, the self.select method will be called whenever we change the selection in the listbox.
The method will be passed an event object as an argument which can be used to determine the details of what happened.
In our case, we don’t need any of this information, we can simply access the listbox directly to find out which item has been selected.
We can define the select method as follows:
def select(self, event):
    """Update the entry widget with the selected item"""
    index = self.list.curselection()
    if index:
        item = self.list.get(index)
        if item:
            self.item.set(item)
It should be fairly familiar.
All we are doing is finding the right item in the list widget, then we get its value and use it to set the value of the entry widget (via our self.item attribute).
The event will trigger when deselecting too.
We need to be careful to ensure that both an item has been selected and that the item contains text.
We could use the new assignment expressions (the “walrus operator”) for a neater implementation.
def select(self, event):
   """Update the entry widget with the selected item"""
   if index := self.list.curselection():
       if item := self.list.get(index[0]):
           self.item.set(item)
I actually quite like this.
Now we also want to add the following line to the delete method to clear the entry if the selected item is deleted.
self.item.set("")
That’s it. Here’s the final code.
import tkinter as tk

small = ('Helvetica', 18)
large = ('Helvetica', 24)

class ShoppingList(tk.Tk):
    def __init__(self):
        super().__init__()
        self.title('My Shopping List')

        # the current/new item
        self.item = tk.StringVar()

        # create widgets
        self.label = tk.Label(
            text='My awesome shopping list app',
            font=large
        )
        self.list = tk.Listbox(
            selectmode=tk.SINGLE,
            font=small,
            width=30
        )
        self.entry = tk.Entry(
            font=small,
            width=30,
            textvariable=self.item
        )
        self.add_btn = tk.Button(
            text="Add",
            font=large,
            command=self.add
        )
        self.update_btn = tk.Button(
            text="Update",
            font=large,
            command=self.update
        )
        self.delete_btn = tk.Button(
            text="Delete",
            font=large,
            command=self.delete
        )

        # position widgets
        self.label.grid(
            padx=20,
            pady=20,
            row=0,
            column=0,
            columnspan=2
        )
        self.entry.grid(
            padx=20,
            row=1,
            column=0
        )
        self.list.grid(
            padx=20,
            pady=20,
            row=2,
            column=0,
            rowspan=3
        )
        self.add_btn.grid(
            sticky="nsew",
            padx=(0, 20),
            pady=20,
            row=2,
            column=1
        )
        self.update_btn.grid(
            sticky="nsew",
            padx=(0, 20),
            row=3,
            column=1
        )
        self.delete_btn.grid(
            sticky="nsew",
            padx=(0, 20),
            pady=20,
            row=4,
            column=1
        )

        # events
        self.list.bind("<<ListboxSelect>>", self.select)

    def add(self):
        """Add the current entry text to the list"""
        item = self.item.get()
        if item:
            self.list.insert(tk.END, item)
            self.item.set("")

    def delete(self):
        """Delete the currently selected item"""
        index = self.list.curselection()
        if index:
            self.list.delete(index[0])
            self.item.set("")


    def update(self):
        """Update the currently selected item"""
        index = self.list.curselection()
        item = self.item.get()
        if index and item:
            self.list.delete(index[0])
            self.list.insert(index[0], item)
            self.item.set("")

    def select(self, event):
        """Update the entry widget with the selected item"""
        if index := self.list.curselection():
            if item := self.list.get(index[0]):
                self.item.set(item)

app = ShoppingList()
app.mainloop()
Implement load and save
Try to implement automated load and save functionality so that the programme automatically saves the list to a specified file on shutdown and loads the data from the same file when the programme starts.
Hints
There are a few important things to think about
- Store a
pathlib.Pathobject as a class attribute for convenience.- Specify a default filename but allow the calling code to use a custom value when creating a
ShoppingListinstance.- Implement
loadandsavemethods to actually do the work of writing and reading from the file.- Trigger your
loadmethod from within the__init__method.- Be very careful when triggering your
savemethod.Your
savemethod can be triggered in this way from within the__init__method.self.protocol("WM_DELETE_WINDOW", self.save_and_exit)The above ensures that when the window manager close button is clicked to close the window, the method
save_and_exitwill be triggered.Where the
save_and_exitmethod looks something like this.def save_and_exit(self): self.save() self.destroy()You need to be very careful about this because if you don’t destroy the window in this method then you will have no way to close the programme.
- The
savemethod will need to useself.list.get(0, tk.END)to extract a list from the listbox widget.- Given a list
items, theloadmethod can callself.list.insert(0, *items)to load them into the listbox widget.
Compound widgets and UI design
We have built a working shopping list application which allows us to manage a list of items. We implemented features which allowed us to add new items, edit and delete existing items and in the challenges (as shown in the solution video) allowed our list to be saved to a file when the application was closed and loaded when the application was opened.
Our application is functional but the interface is neither intuitive nor convenient. So, we will redesign our application with a more advanced user interface.
Consider the update functionality.
In order to edit an item we need to go through four steps and requires switching from mouse to keyboard and back to mouse:
- select the item to edit
- select the entry field
- type a new value
- click the ‘Update’ button
This is not ideal.
It is possible to use the
tabkey (usually nearQandCaps Lock) to navigate the widgets without the mouse. Using the spacebar will click buttons. But, even with this convenience, the interface is still ‘clunky’.
Even simply deleting an item from the list requires two steps:
- Select the item
- Click the ‘Delete’ button
Adding an item is surprisingly complicated:
- Select the entry field
- Type a new value
- Click the ‘Add’ button
All this adds up to a poor user experience. Anything we can do to improve this (even just a tiny bit) will help our users to be more productive.
We can do better
Let’s reimagine the shopping list application.
A key feature we would like to have is the ability to select an item from the list and edit it directly, in place.
Perhaps we can use tk.Entry widgets to enable this?
Another feature we would like is to be able to simply press enter when adding or editing an item to trigger the action. We can bind keyboard events to event handlers.
Finally, it would be nice to have a delete button next to every item so we can easily delete an item with one click.
So, each tk.Entry widget needs an associated tk.Button.
Fundamentally, the tk.Listbox widget doesn’t allow us to do this.
All it can do is present a list.
There is no way to add anything other than simple text into a listbox widget.
So, we will replace our Listbox with a tk.Frame (basically a container widget).
This will allow us to build dynamic content and place it inside the frame.
| 1 | 2 | |
|---|---|---|
| 1 | Shopping List | |
| 2 | tk.Entry | Add |
| 3 | tk.Frame | |
| 4 | Clear | |
Our new design includes five widgets in a two by four grid.
In the top row we have a simple tk.Label spanning two columns.
The second row has a tk.Entry and tk.Button to allow users to add new items.
The tk.Frame takes up the third row, spanning both columns.
Underneath the frame, we have also added a tk.Button in the second column to allow the user to clear the entire list.
Everything else, including editing and deleting items, will happen within the frame.
So our table of widgets looks like this:
| widget | row | column | rowspan | columnspan |
|---|---|---|---|---|
| label | 0 | 0 | - | 2 |
| add_entry | 1 | 0 | - | - |
| add_btn | 1 | 1 | - | - |
| frame | 2 | 0 | - | 2 |
| clear_btn | 3 | 1 | - | - |
Just as in the previous design, we can build these widgets in the application constructor method (ShoppingList.__init__()).
We first need to create the data and widgets and then we place them using grid() and the values in the above table.
We can begin with something like this:
Start a new file for this (obviously?).
import tkinter as tk

font = ('Helvetica', 20)

class ShoppingList(tk.Tk):
    def __init__(self):
        super().__init__()
        self.title("Shopping List")

        # variables
        self.new_item = tk.StringVar()

        # create widgets
        self.label = tk.Label(
            text="Shopping List",
            font=font
        )

        self.entry = tk.Entry(
            textvariable=self.new_item,
            width=30,
            font=font
        )

        self.add_btn = tk.Button(
            text="Add",
            command=self.add,
            font=font
        )

        self.frame = tk.Frame(
            bg="#aaa"
        )

        self.clear_btn = tk.Button(
            text="Clear",
            command=self.clear,
            font=font
        )

        # layout widgets
        self.label.grid(columnspan=2, pady=(10, 0))
        self.entry.grid(row=1, column=0, sticky="nesw")
        self.add_btn.grid(row=1, column=1, sticky="nesw")
        self.frame.grid(sticky="nesw", columnspan=2)
        self.clear_btn.grid(column=1, sticky="nesw")

    def add(self):
        print('add command')

    def clear(self):
        print('clear command')

app = ShoppingList()
app.mainloop()
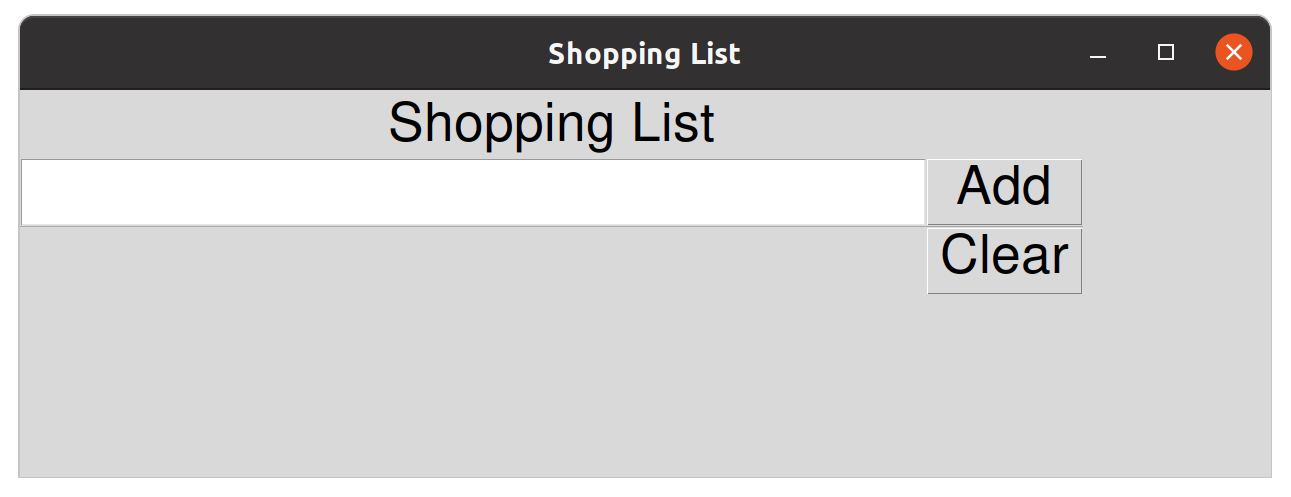
The result shouldn’t be surprising, the frame widget has no contents and so takes up no space by default.
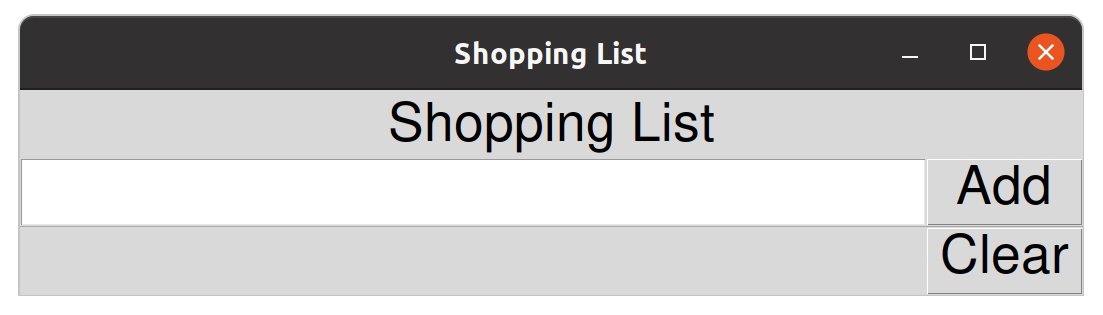
Try changing the size of the window. Notice that the widgets don’t respond. They just retain their original size and position.
When we increase the size of the window, we are creating extra space in the interface. By default, none of the rows or columns will take this space.
Flexible rows and columns
In order to allow our GUI to stretch to fit the window, we need to specify which rows and columns should be given the extra space.
We can do this by calling widget.rowconfigure() and widget.columnconfigure().
In this case, we want row 2 (containing the frame) to be given all the extra vertical space. Also column 0 (containing the entry and frame) should be given all the extra horizontal space.
We can specify this at the end of our __init__ method.
# configure rows and columns
self.rowconfigure(2, weight=1)
self.columnconfigure(0, weight=1)
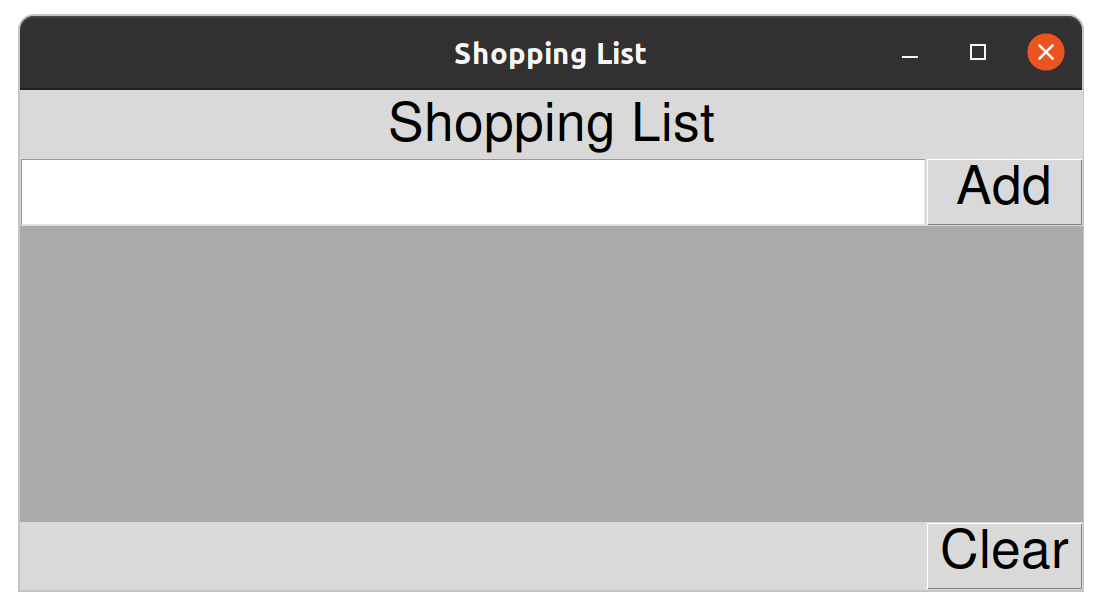
Now you should see that the GUI stretches to fit the size of the window.
We set the background colour of the frame to make it clear what is happening.
However, the empty frame still takes up no height by default.
We can fix this by setting a minimum size for the main window as follows (again, in the __init__ method).
self.minsize(500, 500)
Here we are setting the minimum height to 500px and our interface stretches accordingly. The minimum width is also set. This has no effect on the default size since the entry and the buttons take up space by default. However, you should find that the window cannot now be shrunk beyond these limits.
Great, we have a nice starting point for building a decent shopping list implementation. Now we need to activate some of the familiar functionality.
Adding items
When the user enters a value into the entry widget and clicks the ‘Add’ button, we want to see the entered item appear inside our frame and the entry widget should be cleared.
We will begin by experimenting with inserting simple tk.Label widgets dynamically to represent the items in our list.
Update the add method as follows:
def add(self):
    """Add a new item to the end of the list"""
    item = self.new_item.get()
    if item:
        label = tk.Label(text=item, font=font)
        label.grid()
        self.new_item.set("")
Running the application and adding a few items to the list reveals that the new label widgets are being appended to the end of the main window (inside the first column).
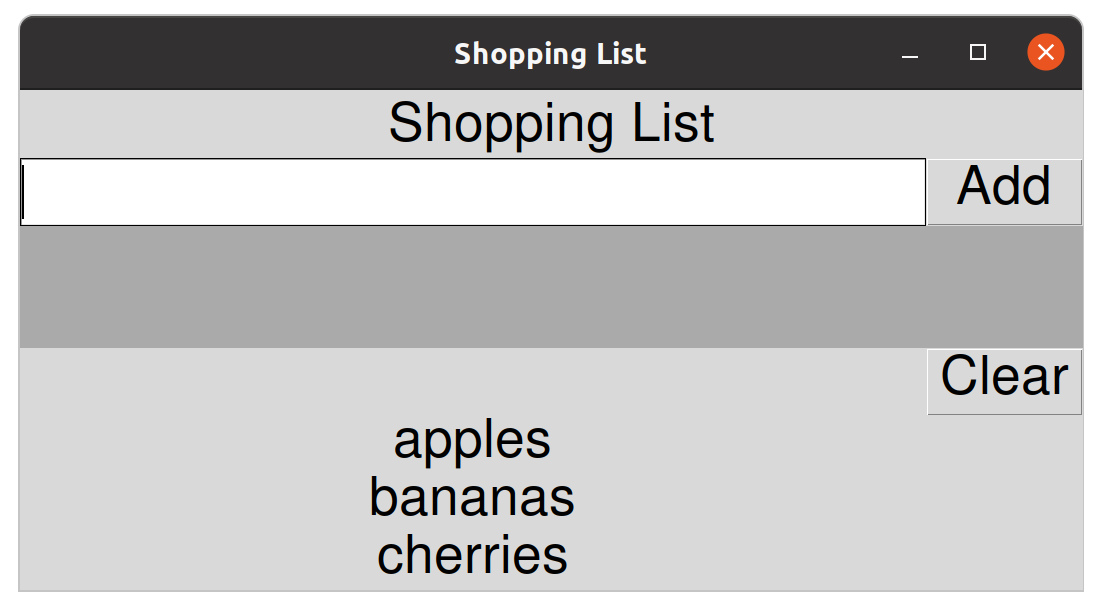
This is not good!
We want the system to create the label inside our frame.
To do this we need to pass in self.frame as the first argument to the tk.Label constructor.
Update the add method with this.
label = tk.Label(self.frame, text=item, font=font)
All widgets take this optional
parentargument. Until now, we have been creating all our widgets inside the top level window. We didn’t need to manage any nesting because this is the default behaviour.Its good practice to always provide a
parentwidget (or top-level window).
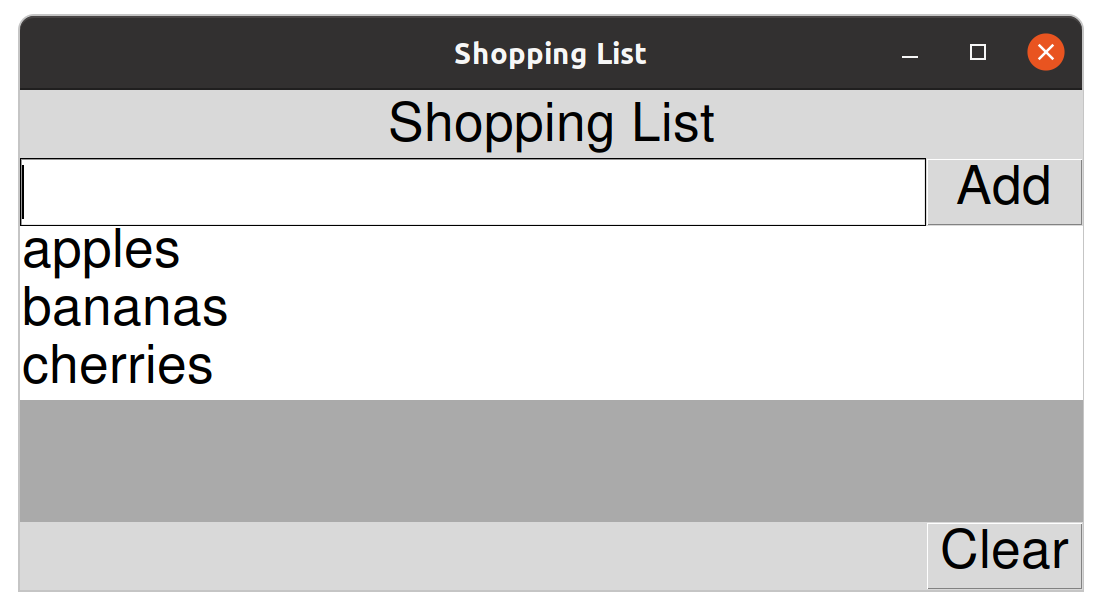
Now, when we add items, they are inserted inside the frame.
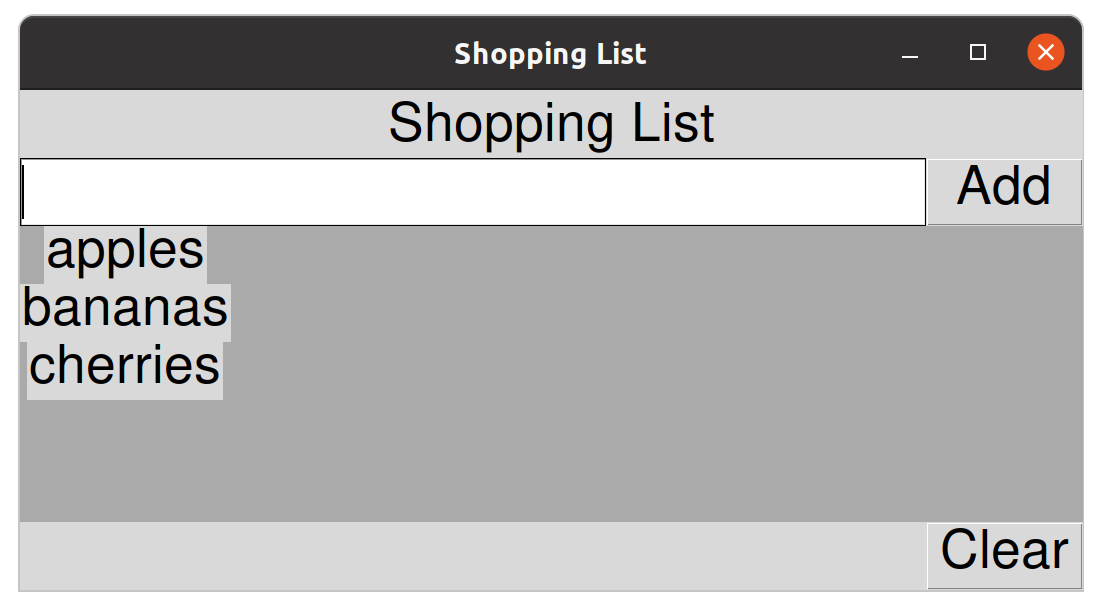
This is unexpected. The labels are clearly center aligned but they are not taking the full width of the frame.
There are a few issues we need to sort out here. We want the labels to have a white background and the label text should be left aligned.
We can configure the labels easily enough by setting anchor (to left align the text) and bg (the background colour).
See the documentation for labels for details.
label = tk.Label(
    self.frame,
    text=item,
    font=font,
    anchor=tk.W,
    bg="white"
)
Plus we need to set the sticky attribute when calling grid to make the label stretch to take the full width.
label.grid(sticky="nesw")
OK, nearly there. The labels are placed within the first (and only) column of the frame. But the column doesn’t cover the entire width of the frame. In fact, it’s taking up the minimum possible space within the frame.
If we want to configure the column to take up all the available space, we need to specify this when we configure the frame.
Add this to the end of your __init__ method.
self.frame.columnconfigure(0, weight=1)
This tells the frame that its first (and only) column should be given all the extra space available inside the parent frame. The GUI should now resize well.
feel free to experiment with formatting the padding, colours and fonts of the various widgets.
Finally, we want to trigger the add method whenever the return key is pressed inside the entry widget.
We can do this with an additional line of code at the end of the __init__ method.
# events
self.entry.bind("<Return>", lambda e: self.add())
The code is binding our add method to the <Return> event of the self.entry widget.
Basically, this will automatically call the add method whenever the return key is pressed from inside the widget.
We are wrapping our function call in a
lambdafunction.lambda e: self.add()This is shorthand for a named function like this:
my_event_handler(e):
  self.add()
We could have declared the above function and bound it to the
<Return>event like this.self.entry.bind("<Return>", my_event_handler)The only reason we need to do this wrapping is because we want to ignore the argument (
e) passed into the event handler bytkinter. This allows ouraddmethod to remain unchanged, taking no arguments.
Clearing the list
To clear the list we will need to remove the label widgets from the application.
We can do this by calling the destroy() method on each label in turn.
However, we don’t currently have any way to do this for our label widgets because we don’t have a reference to them. We need to retain a reference to the labels we are adding so we can call the destroy() method on each of them.
In the __init__ method, create a new self.items attribute to store the label widgets in a list.
You can add this in the section we labelled with the comment '# variables'.
self.items = []
Now, whenever we add a new item, we should also append it to the new list.
Insert this single line into the add method to do this.
def add(self):
    """Add a new item to the end of the list"""
    item = self.new_item.get()
    if item:
        label = tk.Label(
            self.frame,
            text=item,
            font=font,
            anchor=tk.W,
            bg="white"
        )
        self.items.append(label) # <- this
        label.grid(sticky="news")
        self.new_item.set("")
Now, every time we add a new item, the resulting label widget will be added to our self.items list and will be available to our code.
To clear the list, we should be able to loop over self.items and call destroy() on each label in turn before replacing the list with an empty one.
Let’s do this in our clear method.
def clear(self):
    for label in self.items:
        label.destroy()
    self.items = []
Try it. You should now be able to clear the list by clicking the ‘Clear’ button.
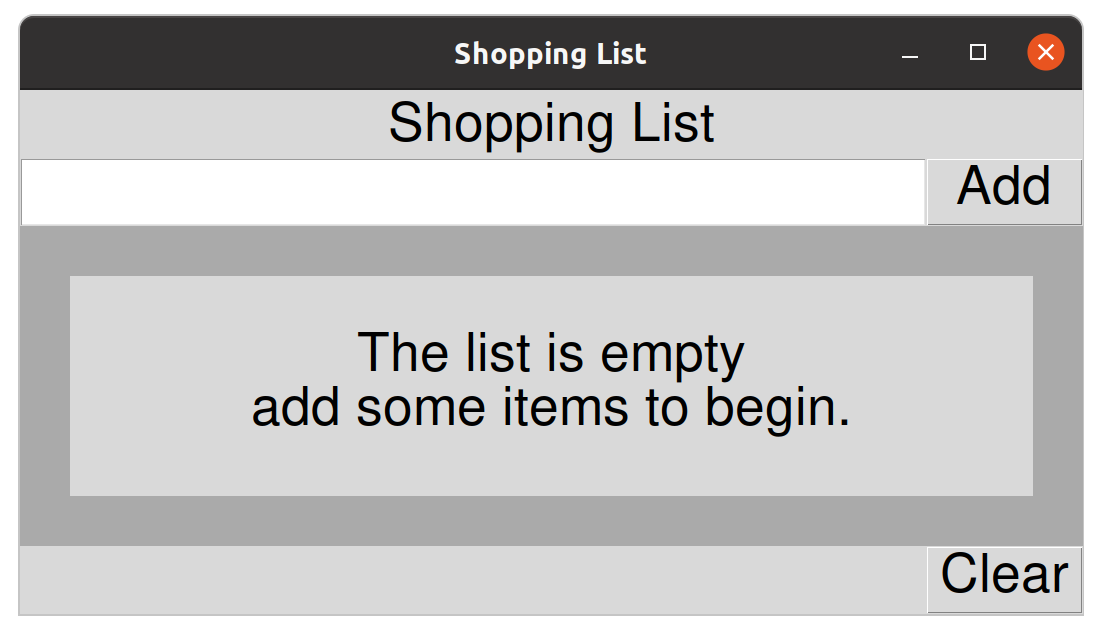
An ‘empty list’ message
You might notice that the frame doesn’t know how to resize itself when the list is cleared. We can fix this with an ‘empty list’ message similar to our command line equivalent. We will add a new label which we will only show when the list is empty.
We can create widgets behind the scenes and show/hide them as we please. Using
grid()andgrid_remove()is one way to do this.grid_remove()will remove the widget from the grid without destroying the widget.
To do this we can begin by creating a label along with the other widget creation code in the __init__ method.
We pass the frame as the parent, just like we did with our item labels.
self.empty_label = tk.Label(
    self.frame,
    text="\nThe list is empty\nadd some items to begin.\n",
    font=font
)
Our
self.empty_labelwidget will be used only when the list is empty.
With the layout code in the __init__ method, we can call grid() on our label with parameters to initialise it’s layout.
self.empty_label.grid(sticky="nesw", padx=50, pady=50)
Calling
grid()registers the widget in the app layout.
Now running the app shows the empty_label widget inside our frame.
But the label should disappear when we add our first item.
When we add an item, in our add method, we need to remove our empty_label widget without destroying it.
We do this by calling the grid_remove() method.
def add(self):
    """Add a new item to the end of the list"""
    item = self.new_item.get()
    if item:
        label = tk.Label(
            self.frame,
            text=item,
            font=font,
            anchor=tk.W,
            bg="white"
        )
        self.items.append(label)
        label.grid(sticky="news")
        self.new_item.set("")
        self.empty_label.grid_remove() # <- new
Calling grid_remove() on a widget simply removes it from the grid layout, so it disappears.
Although it still exists and its grid parameters are remembered, its just not shown.
It can be shown again, in its correct position by calling grid() on it.
Compare this to
destroy()which actually removes the widget from the app entirely.
Subsequently, when the list is cleared, we can call grid() without parameters and the geometry manager will remember where it should be positioned.
def clear(self):
    for label in self.items:
        label.destroy()
    self.items = []
    self.empty_label.grid() # <- new
grid_forget()acts in a similar way togrid_remove()but forgets the grid parameters.
Now you should find that adding and removing items works fine and our message shows whenever the list is empty.
Deleting an item
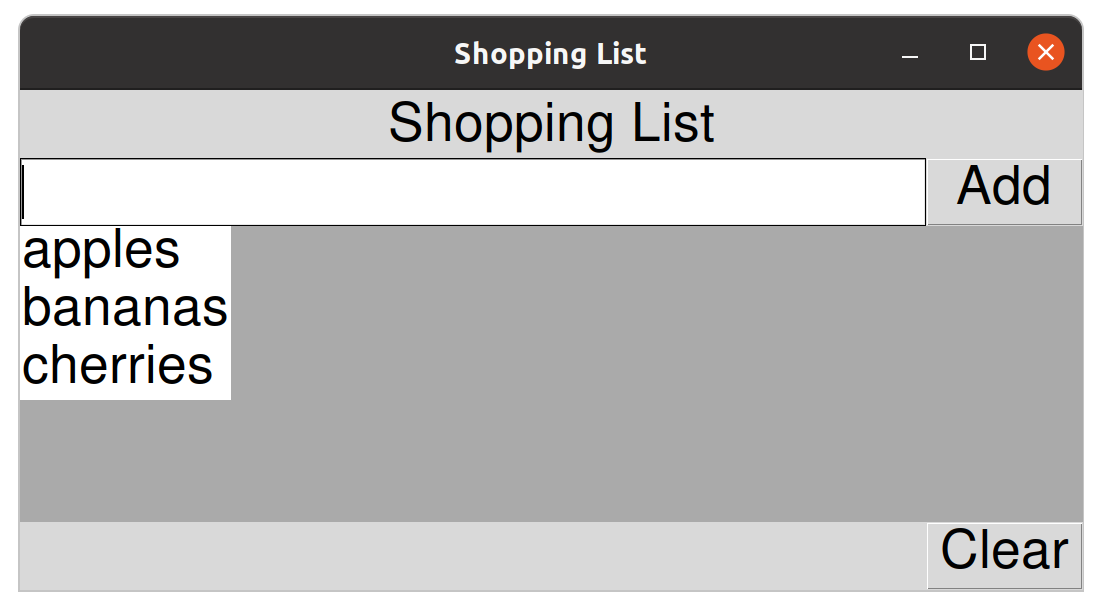
To delete an individual item in our original application, the user needed to first select an item and then click the generic delete button. We can improve this by adding a small delete button to every item. In this way, the user simply clicks the appropriate delete button to remove an item.
For this, we could manage a list of buttons along with our list of labels but this would be complicated. Its much nicer (and perhaps easier) to develop a custom widget.
A custom widget
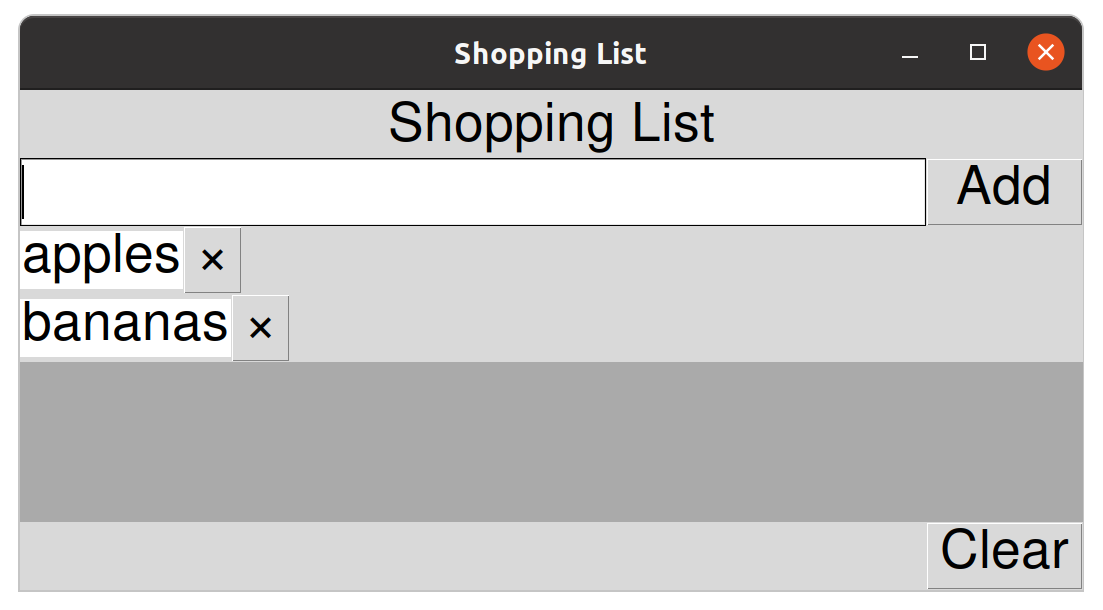
We will design our own custom ShoppingItem widget to represent an item in our list.
The widget will consist of a tk.Label containing the text of the item and a tk.Button which will allow us to delete the item.
| item_label | × |
This is known as a compound widget.
We will insert multiple instances of our ShoppingItem widget into the container frame to represent our list.
| Shopping List | |||||||
| Add | |||||||
|
|||||||
| Clear | |||||||
Each time the user adds a new item, we will insert a new ShoppingItem widget (instead of the tk.Label) into the frame.
Each ShoppingItem will be wrapped in it’s own tk.Frame so it only takes a single column within the main tk.Frame.
We can update our add method in anticipation.
Replacing the tk.Label with a ShoppingItem widget.
This is what it currently looks like.
def add(self):
    """Add a new item to the end of the list"""
    item = self.new_item.get()
    if item:
        label = tk.Label(
            self.frame,
            text=item,
            font=font,
            anchor=tk.W,
            bg="white"
        )
        label.grid(sticky="nesw")
        self.items.append(label)
        self.new_item.set("")
        self.empty_label.grid_remove()
To create an instance of our new ShoppingItem widget we need to replace this code.
label = tk.Label(
    self.frame,
    text=item,
    font=font,
    anchor=tk.W,
    bg="white"
)
Obviously we don’t want to call the ShoppingItem widget label.
It makes sense to call it something like item.
But we already have a variable called item within the function.
So we need to refactor.
It’s always a good idea to refactor your variable names when something like this happens. Avoid names like
item2or meaningless names. Variables should always be named in a way that feels natural.
In this case, the value we get from the entry widget is renamed to text and the widget is renamed to item.
You may have better ideas.
So we can update our method to this.
def add(self):
    """Add a new item to the end of the list"""
    text = self.new_item.get()
    if text:
        item = ShoppingItem(self.frame, text=text)
        item.grid(sticky="nesw")
        self.items.append(item)
        self.new_item.set("")
        self.empty_label.grid_remove()
Note that we changed five lines and that we are presuming an API for our ShoppingItem class constructor method.
We are assuming that we will set all the label parameters within the widget constructor method.
So all the widget needs to know is where it should place itself (self.frame) and the label text it should use (text=text).
Now we need to define the widget class itself.
We will extend the tk.Frame class to do this, so our widget with be a kind of tk.Frame.
We will start by simply adding a label and a button and calling grid() on both.
class ShoppingItem(tk.Frame):
    def __init__(self, parent, text):
        super().__init__(parent)
        self.label = tk.Label(
            self,
            text=text,
            font=font,
            anchor=tk.W,
            bg="white"
        )
        self.button = tk.Button(self, text='×', font=font)
        self.label.grid()
        self.button.grid()
The button text is a single utf-8 multiplication symbol,
'×'.
So basically our new widget is a tk.Frame.
It’s a customised tk.Frame that automatically places some widgets inside itself.
This is why we can pass self into the label and button constructors as the parent argument.
Because self is the frame which wraps our custom widget.
Try adding a few items and we can see that each of our ShoppingItem widgets is self-contained.
But the label and button widgets are not positioned how we want them.
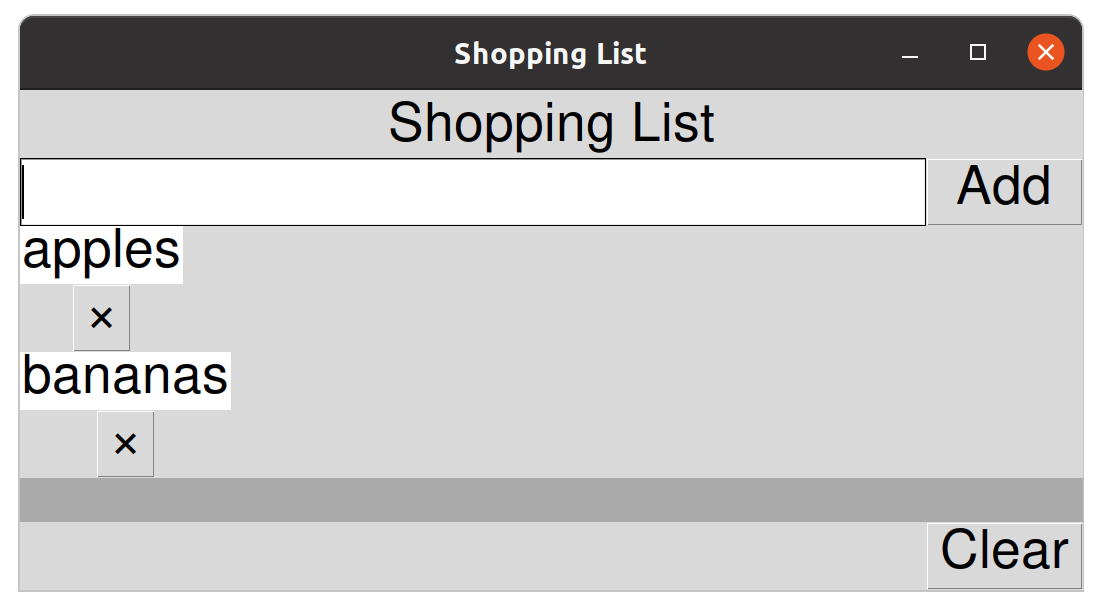
We need to use the column and row arguments to place the label and button on a single row within our custom widget.
class ShoppingItem(tk.Frame):
    def __init__(self, parent, text):
        super().__init__(parent)
        self.label = tk.Label(
            self,
            text=text,
            font=font,
            anchor=tk.W,
            bg="white"
        )
        self.button = tk.Button(self, text='×', font=font)
        self.label.grid(row=0, column=0)
        self.button.grid(row=0, column=1)
Much better, but we have a familiar problem.
We should tell the ShoppingList widget to stretch column 0 when there is extra space.
We do this with columnconfigure.
class ShoppingItem(tk.Frame):
    def __init__(self, parent, text):
        super().__init__(parent)
        self.label = tk.Label(
            self,
            text=text,
            font=font,
            anchor=tk.W,
            bg="white"
        )
        self.button = tk.Button(self, text='×', font=font)
        self.label.grid(row=0, column=0)
        self.button.grid(row=0, column=1)
        self.columnconfigure(0, weight=1)
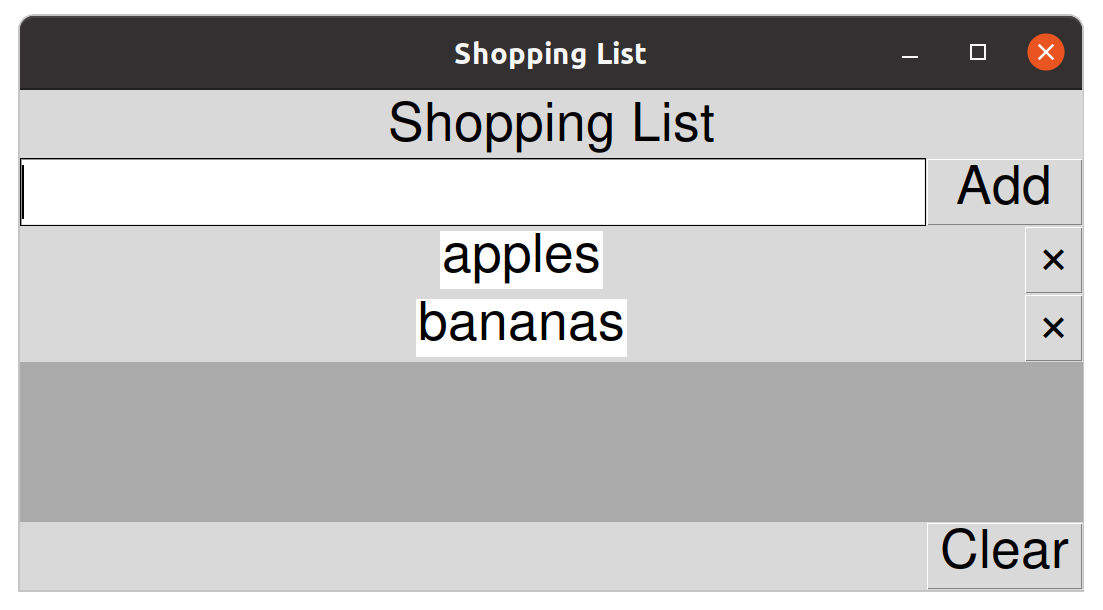
Great, but the label is positioned in the middle of the grid cell by default. We forgot to tell the label to expand to fill its grid cell.
Add the sticky argument to the call to self.label.grid()
class ShoppingItem(tk.Frame):
    def __init__(self, parent, text):
        super().__init__(parent)
        self.label = tk.Label(
            self,
            text=text,
            font=font,
            anchor=tk.W,
            bg="white"
        )
        self.button = tk.Button(self, text='×', font=font)
        self.label.grid(row=0, column=0, sticky="nesw")
        self.button.grid(row=0, column=1)
        self.columnconfigure(0, weight=1)
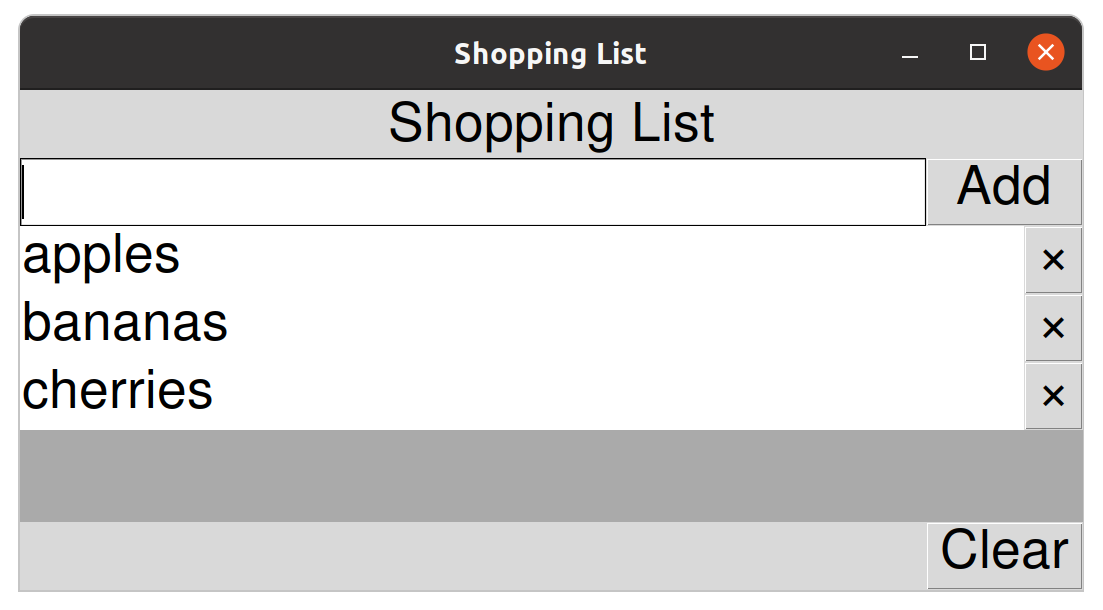
OK, now we have a sensible looking shopping list with buttons to delete each item.
As we know, we need to set a command argument on the button to a method which will be triggered when the button is pressed.
We need a method that will delete the ShoppingItem instance from the application.
Let’s call it self.delete.
Update the button as follows:
self.button = tk.Button(
    self,
    text='×',
    font=font,
    command=self.delete
)
This is an update to the existing code, wrapping the arguments over multiple lines and adding the
commandargument.
Now we can add a ShoppingItem.delete() method to test it works.
We’ll start by seeing if we can print the item label text when the delete button is clicked.
def delete(self):
    print(self.label['text'])
It turns out we can access the text of a label with dictionary-like indexing.
If you try this, you should find that it works perfectly.
Refactoring
Now we need to actually trigger the removal of the list item.
This is interesting because we know the ShoppingList class is responsible for managing it’s self.items list.
So it should be responsible for doing the delete operation.
But we are triggering the delete operation from the button in the ShoppingItem class.
Pay attention here. We are about to refactor our code to make the task easy.
Re-read the above paragraph. If you understand what we do next, then you understand something important.
So when the delete button is pressed, our ShoppingItem instance (which represents 'apples' for example and has the delete button built in) needs to inform the parent ShoppingList instance (the entire application) that it (the ShoppingItem representing ‘apples’) should be deleted.
Put another way, rather than destroying itself, the ShoppingItem is better off calling something like a ShoppingList.delete() method and passing itself (literally self) as the argument.
If the
ShoppingItemtried to delete itself by callingself.destroy()it would leave a reference to itself in theShoppingList.itemsattribute. There are bad ways to do this that would work.
To enable this, we need to refactor our code slightly.
Our ShoppingItem instances need access to the parent ShoppingList in order to call the proposed ShoppingList.delete() method.
So the first thing we will do is change the ShoppingList.add() method so our ShoppingList passes a reference to itself into all the newly created ShoppingItem instances.
def add(self):
    """Add a new item to the end of the list"""
    text = self.new_item.get()
    if text:
        item = ShoppingItem(self, text=text)
        item.grid(sticky="nesw")
        self.items.append(item)
        self.new_item.set("")
        self.empty_label.grid_remove()
Notice the difference, we now pass
selfrather thanself.frameinto theShoppingItemconstructor. So our items have access to the entireShoppingListinterface.
This change requires a small tweak to the first few lines of the ShoppingItem constructor.
Rather than receiving a tk.Frame instance, we now receive the ShoppingList instance which has the self.frame attribute.
def __init__(self, shopping_list, text):
    super().__init__(shopping_list.frame)
    self.shopping_list = shopping_list
    self.label = tk.Label(
        self,
        text=text,
        font=font,
        anchor=tk.W,
        bg="white"
    )
    self.button = tk.Button(
        self,
        text='×',
        font=font,
        command=self.delete
    )
    self.label.grid(row=0, column=0, sticky="nesw")
    self.button.grid(row=0, column=1)
    self.columnconfigure(0, weight=1)
We have renamed the parent argument to shopping_list to reflect the change.
We now pass
shopping_list.frameinto the inheritedtk.Frameconstructor as the parent widget. Remember,ShoppingList.frameis thetk.Framewidget where theShoppingItemwidgets live in the application.
The most important change (and the reason for the refactor) is that we can now store a reference to the ShoppingList as self.shopping_list.
Let’s now update our ShoppingItem.delete() method to hand over responsibility to a proposed ShoppingList.delete() method.
def delete(self):
    self.shopping_list.delete(self)
This code is the
ShoppingItem.delete()method, in a moment we will implement theShoppingList.delete()method too.
This is an important piece of code, it tells the application to ‘delete this item’, where ‘this item’ is self.
The clicked button is part of the
ShoppingItemclass. It has a reference to the parent application, so it can now easily request to be deleted.This is an important idea. Each part of the system has its own responsibilities. Only the
ShoppingListclass needs to know how to delete an item from the list.
Let’s implement the ShoppingList.delete() method.
In order to delete an item, we need to call destroy() on the widget itself and remove the widget from the list.
def delete(self, item):
    self.items.remove(item)
    item.destroy()
Remember, this goes on the
ShoppingListclass
We have implemented a method that takes an argument called item.
We use the list.remove() method to find and remove the item.
If the item was not on the list, this would raise an error. However, this situation will never arise.
Finally we call item.destroy() to actually delete the widget from the application entirely.
You should now be able to delete any item by clicking it’s delete button.
One last thing we should do is check to see if we have removed the last item.
If we leave the list empty, then we should show the self.empty_label widget.
def delete(self, item):
    self.items.remove(item)
    item.destroy()
    if not self.items:
        self.empty_label.grid()
OK, we have built the main application. Here are a few challenges to test how well you understand what we have done.
Editing an item
Update the
ShoppingItemclass to be editable.Its not possible to directly edit a label widget. The easiest thing to do here is to replace the
tk.Labelwith atk.Entrywidget.Don’t worry, this is actually a fairly trivial change.
The full code listing looks like this.
import tkinter as tk

small_font = ('Helvetica', 14)
font = ('Helvetica', 20)


class ShoppingItem(tk.Frame):
    def __init__(self, shopping_list, text):
        super().__init__(shopping_list.frame)
        self.shopping_list = shopping_list
        self.text = tk.StringVar(shopping_list, text)
        self.entry = tk.Entry(
            self,
            textvariable=self.text,
            font=font
        )
        self.button = tk.Button(
            self,
            text="×",
            font=font,
            command=self.delete
        )
        self.entry.grid(row=0, column=0, sticky="nesw")
        self.button.grid(row=0, column=1)
        self.columnconfigure(0, weight=1)

    def delete(self):
        self.shopping_list.delete(self)


class ShoppingList(tk.Tk):
    def __init__(self):
        super().__init__()
        self.title("Shopping List")
        self.minsize(500, 500)

        # variables
        self.new_item = tk.StringVar()
        self.items = []

        # create widgets
        self.label = tk.Label(text="Shopping List", font=font)
        self.entry = tk.Entry(
            textvariable=self.new_item,
            width=30,
            font=font
        )
        self.add_btn = tk.Button(
            text="Add",
            command=self.add,
            font=font
        )
        self.frame = tk.Frame(bg="#aaa")
        self.clear_btn = tk.Button(
            text="Clear",
            command=self.clear,
            font=font
        )
        self.empty_label = tk.Label(
            self.frame,
            text="""\nThe list is empty
add some items to begin.\n""",
            font=font
        )

        # layout widgets
        self.label.grid(columnspan=2, pady=(10, 0))
        self.entry.grid(row=1, column=0, sticky="nesw")
        self.add_btn.grid(row=1, column=1, sticky="nesw")
        self.frame.grid(sticky="nesw", columnspan=2)
        self.clear_btn.grid(column=1, sticky="nesw")
        self.empty_label.grid(sticky="nesw", padx=50, pady=50)

        # configure rows and columns
        self.columnconfigure(0, weight=1)
        self.rowconfigure(2, weight=1)
        self.frame.columnconfigure(0, weight=1)

        # events
        self.entry.bind("<Return>", lambda e: self.add())

    def add(self):
        """Add a new item to the end of the list"""
        text = self.new_item.get()
        if text:
            item = ShoppingItem(self, text=text)
            item.grid(sticky="nesw")
            self.items.append(item)
            self.new_item.set("")
            self.empty_label.grid_remove()

    def delete(self, item):
        self.items.remove(item)
        item.destroy()
        if not self.items:
            self.empty_label.grid()

    def clear(self):
        for item in self.items:
            item.destroy()
        self.items = []
        self.empty_label.grid()

app = ShoppingList()
app.mainloop()
Saving and loading the list
As in the previous example, we need our application to load a file on startup and save back to the file on exit. Although there are significant differences.
Hint: Remember, an entry widget can be assigned a
textvariableto make the data accessible.Something like this in the
ShoppingItemconstructor:self.text = tk.StringVar(self.shopping_list, text)will allow something like this in the
ShoppingList:def save(self): with self.path.open('w') as f: for item in self.items: print(item.text.get(), file=f)