Lab A.8: Refining the GUI
Part of Appendix A: ExtrasGeneral setup
For all lab exercises you should create a folder for the lab somewhere sensible.
Assuming you have a GAMR1520-labs folder, you should create a GAMR1520-labs/week_A folder for this week and a GAMR1520-labs/week_A/lab_A.8 folder inside that.
Create a collection of scripts. If necessary, use folders to group related examples.
GAMR1520-labs
└─ week_A
    └─ lab_A.8
        ├─ experiment1.py
        └─ experiment2.py
Try to name your files better than this, the filename should reflect their content. For example, string_methods_.py, conditionals.py or while_loops.py.
Make sure your filenames give clues about what is inside each file. A future version of you will be looking back at these, trying to remember where a particular example was.
General approach
As you encounter new concepts, try to create examples for yourself that prove you understand what is going on. Try to break stuff, its a good way to learn. But always save a working version.
Modifying the example code is a good start, but try to write your own programmes from scratch, based on the example code. They might start very simple, but over the weeks you can develop them into more complex programmes.
Think of a programme you would like to write (don't be too ambitious). Break the problem down into small pieces and spend some time each session trying to solve a small problem.
Lab 8: Refining the GUI
This week we will make our 2048 GUI more attractive using better colours. We will also implement “game over” and “well done” messages and allow the user to restart.
Setting the basic background colours
The first step is to grab colours from the online version of the game. If we visit the site and view the styles applied to the game elements, or use a colour picker tool, we can extract the precise colours used.
Let’s declare them as named constants above our Game class.
bg1 = "#faf8ef"
bg2 = "#bbada0"
bg3 = "#cdc1b4"
fg1 = "#776e65"
bg1is the colour of the main background
bg2is the colour of the frame, around and between tiles
bg3is the colour of an empty tile
fg1is the main text colour
Now we can set the background of the entire window to bg1 by updating the existing call to self.configure.
self.configure(padx=50, pady=50, bg=bg1)
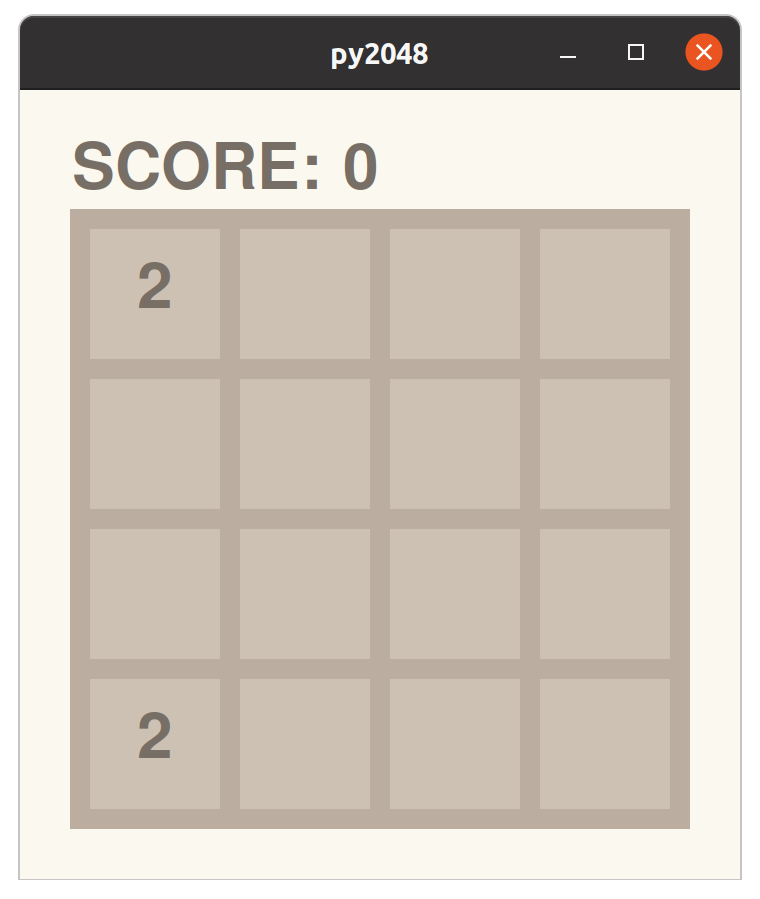
You should see that we also need to set the two score label backgrounds to the same colour and apply the foreground colour too.
tk.Label(text="SCORE: ", font=normal, bg=bg1, fg=fg1).grid(column=0, row=0)
tk.Label(textvariable=self.score, font=normal, bg=bg1, fg=fg1).grid(column=1, row=0, sticky="w")
Now we can also set the background of the frame to bg2 by updating the following line.
frame = tk.Frame(padx=10, pady=10, bg=bg2)
Finally, we will set the tiles to bg3 and fg1 by updating the appropriate line.
tile = tk.Label(frame, textvariable=self.tiles[(row, col)], font=normal, bg=bg3, fg=fg1)
The result should be much closer to what we want.

However, its not quite right. The numbered tiles should each have a different colour.
Setting the tile colours
Tiles are implemented as labels and so, to change their background colour, we need to call their configure method and pass in the new colour value as an argument.
The colours we need are as follows, for each tile value up to 2048. Add this to your file, somewhere at the top.
tile_colours = {
    2: "#eee4da",
    4: "#eee1c9",
    8: "#f3b27a",
    16: "#f69664",
    32: "#f77c5f",
    64: "#f75f3b",
    128: "#edd073",
    256: "#edcc62",
    512: "#edc950",
    1024: "#edc53f",
    2048: "#edc22e"
}
We can now implement a customised version of the standard tk.Label widget that automatically updates its colours accordingly.
class Tile(tk.Label):
    """
    A custom label whose colours and font are determined by the value it's given
    """
    def __init__(self, parent):
        super().__init__(parent, anchor=tk.CENTER)

    def set(self, value):
        self.configure(
            text=value or " ",
            bg=tile_colours.get(value, "#cdc1b4")
        )
Add the class to your code.
We can see it has two methods.
The __init__ method takes a parent argument and passes it to the tk.Label.__init__ method along with another argument anchor which sets the label to be centrally aligned.
The second method, set is the key here.
It takes a value as an argument (e.g. None or 2) and calls the tk.Label.configure method accordingly.
It sets the text property to value or "" just as we were doing already.
But it also sets the bg property to a value drawn from the tile_colours dictionary.
Note that
dict.get()takes an optional second argument which provides a default value to use if the requested key is not found. We use this to set the empty cell colour. This colour would also be used if we reached4096in a cell, since we have not defined a colour for this.
The final change is to the self.tiles dictionary within the Game class.
We change it to contain instances of our new Tile widget, which we place on the grid instead of the tk.Label widgets we had.
self.tiles = {}
for row in range(4):
    for col in range(4):
        self.tiles[(row, col)] = Tile(frame)
        self.tiles[(row, col)].grid(row=row, column=col, sticky="news", padx=10, pady=10)
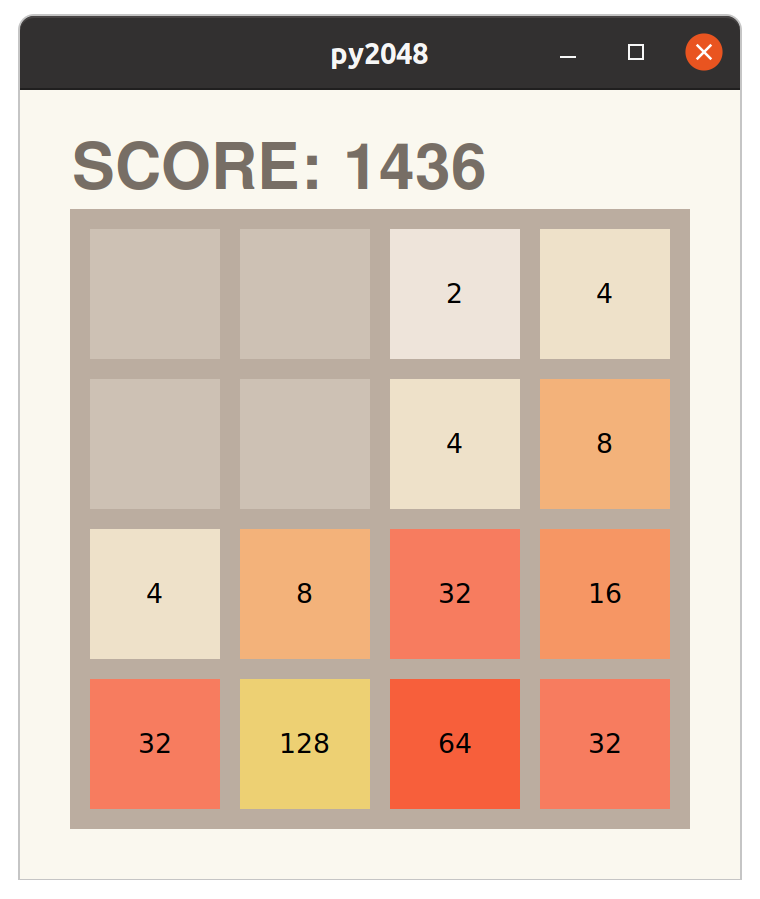
Now, try to run the game and you should see the tiles change colour automatically.

Surprised? This works because we are already calling
seton the tiles in theupdatemethod.
Fonts and foreground colours
Notice we have lost the use of our normal font and that the font colour is wrong.
We can easily update this within the same framework.
Add the following additional constant data at the top of your file with the tile_colours dictionary.
font_colours = {
    2: "#776e65",
    4: "#776e65"
}

fonts = {
    128: ("Helvetica", 20, "bold"),
    256: ("Helvetica", 20, "bold"),
    512: ("Helvetica", 20, "bold"),
    1024: ("Helvetica", 16, "bold"),
    2048: ("Helvetica", 16, "bold")
}
Above, we are defining the unusual cases.
Now, we can set the default values by updating our new Tile.set method.
def set(self, value):
    self.configure(
        text=value or " ",
        bg=tile_colours.get(value, "#cdc1b4"),
        fg=font_colours.get(value, "#f9f6f2"),
        font=fonts.get(value, normal)
    )
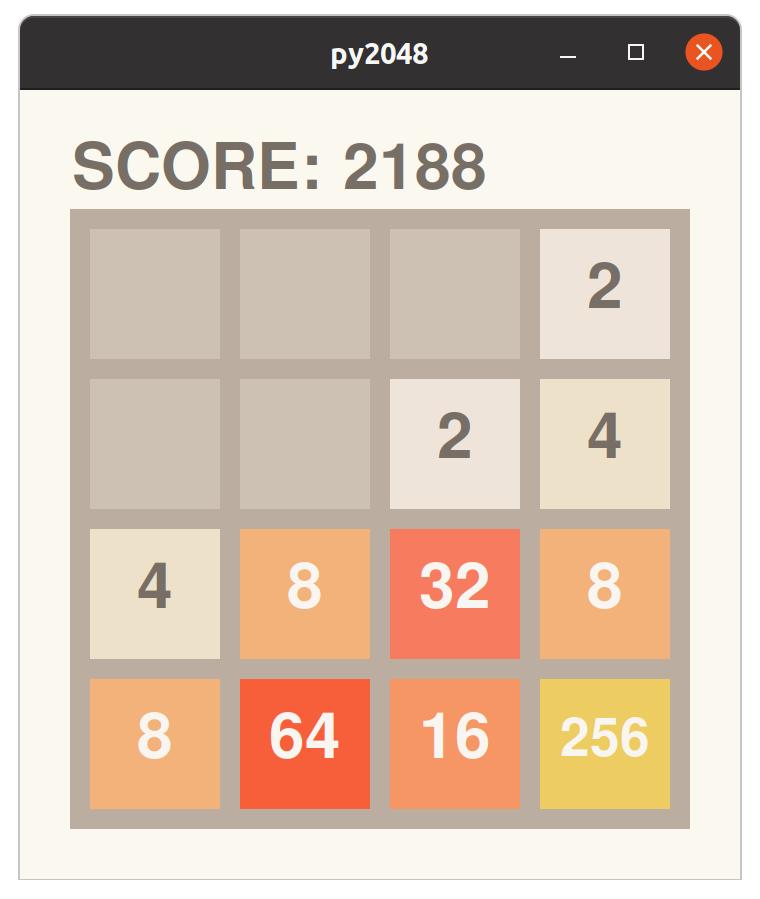
Try again. The game should look pretty much as we want.
Feel free to change the colour scheme

The game is nearly complete.
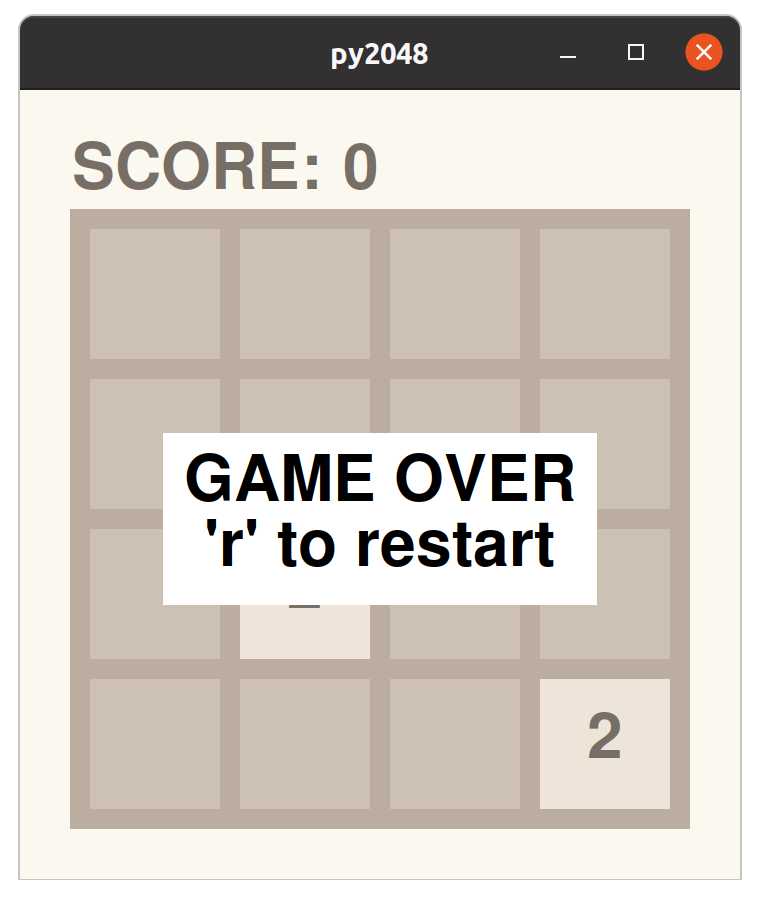
However, if you play a game to completion, when there are no longer any moves available, the game just stops. We want to display a “GAME OVER” message and allow the player to restart.
Adding a restart option
Restarting the game requires resetting the grid to the starting position and setting the score back to zero.
We already do this in the __init__ method, but we would like to extract this functionality into a method we can call on demand.
Create a new restart method as follows.
    def restart(self):
        self.grid = [[None, None, None, None],
                     [None, None, None, None],
                     [None, None, None, None],
                     [None, None, None, None]]

        self.set_random_empty_tile(2)
        self.set_random_empty_tile(2)
        self.score.set(0)
        self.game_over = False
        self.update()
Most of this code came directly from your __init__ method.
Remove the repeated lines from your __init__ method.
Notice that setting the score requires a new line.
Also, we initialise the self.game_over property which we will use in the next section.
Finally, we can call the new method and provide the user access to our new feature by binding the <KeyPress-r> event.
self.restart()
self.bind("<KeyPress-r>", lambda ev: self.restart())
You should now be able to restart the game by pressing the r key at any time.
Detecting and reporting game over
In this final step we will display a labe showing a “game over” message and implement the logic to show the message when the game over state is detected.
We can start by creating a label for the message and placing it on the main window.
self.game_over_message = tk.Label(
    text="GAME OVER\n'r' to restart",
    font=normal,
    bg="white",
    padx=20,
    pady=20
)
self.game_over_message.grid(row=1, column=0, columnspan=2)
Do this in your
__init__method.
Run the game and you should see the message slapped on top of the grid.

But, obviously, we don’t want to show the message unless the game is actually over.
We can implement this very simply using widget.remove_grid() to hide the prepared message.
Add the following to the end of your update method.
if self.game_over:
    self.game_over_message.grid()
else:
    self.game_over_message.grid_remove()
Now, try running the game. The message should no longer appear unless there are no more legal moves.
So that’s it. We are finally done.
Challenges
There are many more features you might want to consider adding, but these will be left for you to consider.
- remember the highest score (maybe write it to a file?)
- present a “well done” message when the user achieves a 2048 tile.
- Make the user interface stretch to fit the window.

